Ideally you will send us your request by program-menu "Help",
in case of problems send an email ....
Then the installation and user protocol is also sent to us
automatically as a zip file. You do not need to do anything
else.
By the way, the transferred data does not include any personal
information.
Customer Feedback
We at proDAD are happy to answer any questions you may have about our program.
-
Answer:
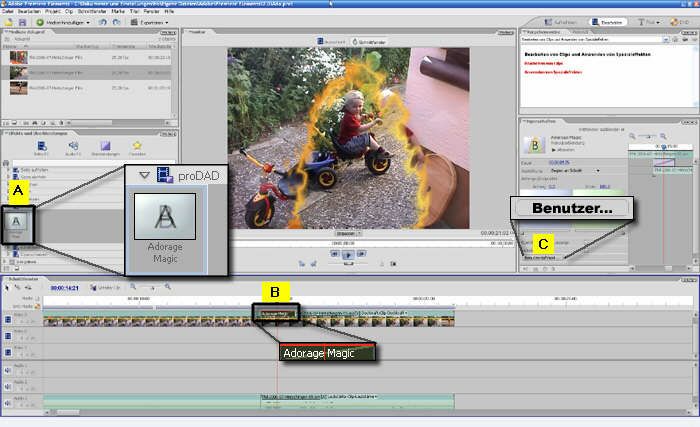
The assignment of the Adorage-Plugin as transition in the timeline generally happens exactly in the same way as with Premiere-own transitions.
Once assigned as transition, press the "Custom..." button in the effect properties of Premiere to find the way to the huge Adorage effectlist with its thousands of presettings and all the Adorage-internal customization possibilities.
Drag the Adorage item from the transition's list [A] to the timeline [B]. Drop Adorage between the overlapping area of the both clips (as you know from Premiere-internal transitions). After the effect is assigned, press "Custom" [C] to customize the effect and/or to get the effect list of the installed Adorage effect packages.
Following [Images #2, #3] shows: how to create overlapping clips
Overlapping clips requires trimmed clips. Trim left clip at the right end and the right clip at its left start.
Move the right clip to the left to create the overlapping area.Links: